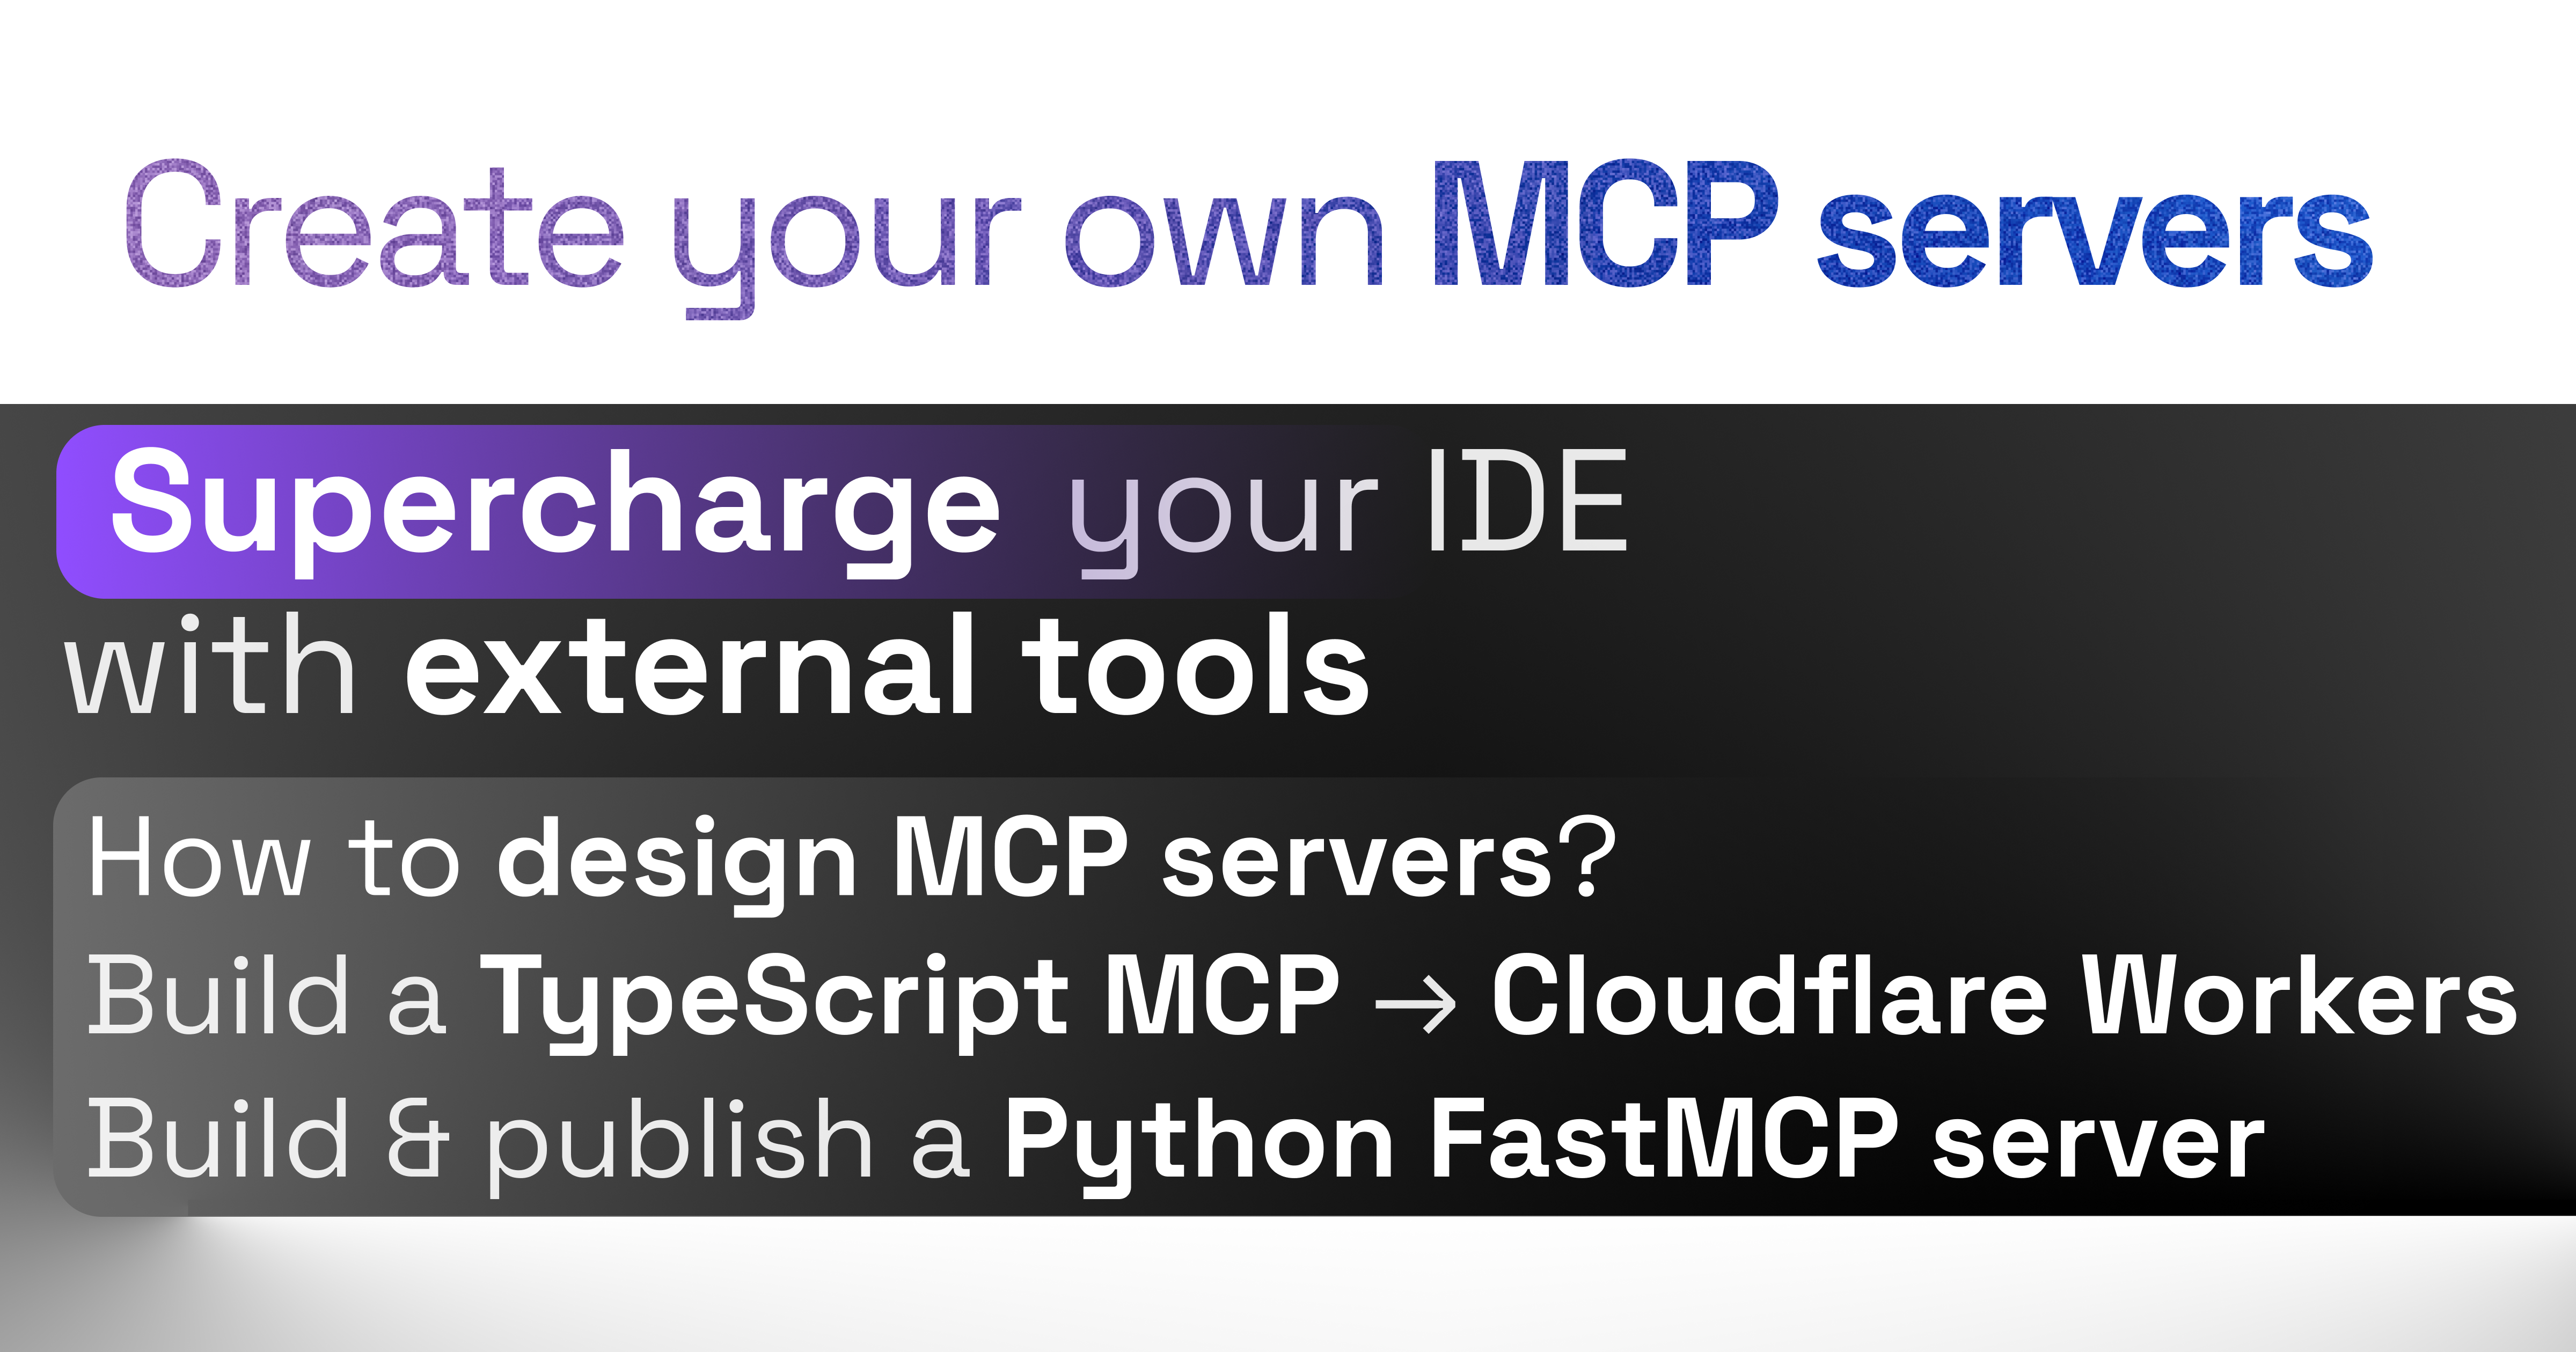
Create your own MCP servers
Discover how to design and build secure MCP servers using Typescript or Python.
 Antonin Marxer
·
·
Table of contents
- MCP architecture & design
- How to design my MCP? Not like APIs.
- How do AI and MCP servers communicate?
- Build & deploy MCP servers for Cloudflare Workers
- Build Python MCP servers with FastMCP
- Use Streamable HTTP
- Use run\async() inside async functions
- Add unit tests
- Add explicit error feedback
- Package your Python MCP Server
- Add Health Checks
- Add auhentication
- Deploy your FastMCP server
- Turn existing agents into MCP servers with auto-mcp
- Conclusion
- Sources
There are many resources on this topic, but I couldn't find a clear overview of MCP servers or a standard method for building one, except for Redditors suggesting to “ask Claude or Windsurf.” I've combined a DevOps perspective, tutorials, and curated lists into this guide, which I hope will clarify the MCP concept and help you implement standard-based MCP servers.
In this article I go through:
MCP Architecture & design:
Understand MCP client-server communication architecture and how to design an MPC (opiniated)Build & deploy TypeScript MCP servers for Cloudflare Workers
Build Python MCP servers with fastmcp
Turn existing agents into MCP servers with auto-mcp
MCP architecture & design
As I mentioned in my previous article How to use MCP servers, the Model Context Protocol (MCP) standard sets up a framework for how a tool and an AI agent can interact. An MCP gives the agent a list of tools it can use, and the agent just needs to pick the right one to complete the task.
For example, you want to manage GitHub PRs and get your GitHub repos from your agent.
→ The GitHub MCP Server wraps GitHubs' features and make them accessible to your IDE’s agent
How to design my MCP? Not like APIs.
Agents that use MCPs are generalists. If you base your MCP on an API specs, the available tools will be atomic/granular and must be used in a specific order to work well together.
Let’s take the image of a customer support ticket API that provides the following endpoints:
createTicketaddMessageassignAgentupdateStatuscloseTicket
For an LLM, this is like being given every screw, wire, and circuit board instead of a "resolve customer issue" button. It has to infer which order matters (should a ticket be assigned before a response is added?), what status transitions are valid (open → pending → resolved vs. open → closed), and when to stop.
In MCP design, you’d expose higher-level tools like:
resolveTicket: handles assignment, messaging, and closingescalateTicket: handles routing and notifying supervisorssummarizeConversation: provides a condensed view for the agent
This shifts the burden away from orchestration logic toward goal completion. The LLM doesn’t need to simulate being a support engineer juggling APIs. It just chooses the right tool for the job.
However, an API is an extremly good starting point.
How do AI and MCP servers communicate?
There are three core components in an MPC communication:
Host: The environment where AI tasks are executed, such as IDEs or AI-powered applications like Claude Desktop.
Client: Acts as an intermediary, managing communication between the host and MCP servers. It handles requests, retrieves server capabilities, and processes notifications.
Server: Provides access to external tools, resources, and prompts. It enables AI models to perform operations like data retrieval, API invocation, and workflow optimization.
MCP process
Your IDE acts as an MCP Host by hosting MCP clients that query MCP servers.
At initialization, your IDE’s agent queries MCP servers to discover available tools with the messages ListToolsRequest/ListToolsResult. Then it calls these tools using CallToolRequest/CallToolResult messages.
MCP Hosting
MCP servers may be deployed in local as well as remote environments.
Local MCP servers follow a privacy-first approach and uses local Standard IO transport protocol.
Remote MCP servers offer:
Consistency: One server version, same behavior for all clients.
Team integration: Add a tool once, instantly available to everyone.
Centralization: No duplicated setup on developer machines.
Scalability: Heavy workloads handled by remote infra, many clients supported.
Isolation: Server exposes only the resources and files it’s meant to.
If your MCP uses sensitive local files or requires very low latency, I suggest to make the MCP server local only.
You’ll see below how to host a MCP server using Cloudflare workers.
In addition to that I’ll give more insights about MCP hosting in a dedicated article
→ stay tuned
MCP Protocols
MCP is transport agnostic, which means the client and server can communicate over different protocols depending on your setup.
However, it always follow an RPC-style pattern (Remote Procedure Call): Think of it as “on demand” requests. It allows clients to invoke methods on remote servers as if they were local function calls. This hides the complexities of model hosting, resource management, and request handling
In your MCP server, responses should follow JSON-RPC 2.0 specification.
Let’s review available protocols:
Standard IO (Stdio): common local bidirectional communication, simple, typical for CLI processes or containers.
HTTP with two subtypes:
SSE (Server-Sent Events): unidirectional server-to-client communication. Real-time push via HTTP, text-only since it uses the
text/event-streamMIME type.It opens a long-lived session in
/sseendpoint.It receives messages form the
/messagesendpoint, and replies through theSSEsession.This is now deprecated: It doesn’t suit ephemeral servers (serverless) as this protocol keeps the SSE session open.
Use Streamable HTTP instead through the/mcpendpoint ⬇️Streamable HTTP: unidirectional or bidirectional HTTP communication with chunked transfer encoding. It uses a single endpoint:
/mcp
WebSocket: A dedicated protocol (
ws://orwss://) enabling interactive bidirectional communication, listening for changes and getting notified when something comes in.
Issues due to remote connections
To push data to clients as needed, SSE & WebSocket connections are long-lived. If you host your MCP server remotely, the connection may remain open for a long time.
Common issues when using HTTP & WebSocket are:
Random connection drop halfway through a response
Most browsers have a limit of 6 concurrent SSE (EventSource) connections per domain, which may be a problem when musing multiple times.
Hard to know where the problem is: MCP client, server or network layer.
As a solution, you should:
Use
/mcpStreamable HTTP protocol.Use snake_case or dash formats for MCP tool names to maintain client compatibility and avoid subtle request failures.
Validate incoming and outgoing payloads against strict JSON schemas to catch errors before processing.
Return common JSON-RPC 2.0 error codes
Implementing meaningful feedback helps handling errors at the MCP Client level.
| Code | Description | Common Cause | How to Handle |
|---|---|---|---|
| jso-32000 | Authentication Error | Missing or invalid token | Return WWW-Authenticate header |
| -32001 | Invalid Session | Session ID not found | Client should reinitialize |
| -32002 | Method Not Found | Client called unknown method | Check method name |
| -32003 | Invalid Parameters | Missing or invalid parameters | Validate parameters |
| -32004 | Internal Error | Server-side exception | Log details for debugging |
| -32005 | Parse Error | Invalid JSON | Validate request format |
Implementing these error-handling strategies ensure that clients receive meaningful feedback when issues occur.
Observability and Troubleshooting
Implement detailed structured logging with unique correlation IDs to trace requests, responses, and errors.
Expose health check endpoints and set up monitoring and alerting on connection errors and abnormal metrics.
MCP security risks & best practices
When you’re running an MCP server locally, it’s the same as running any other software, with unlimited access to all your files. You should use Docker to run MCP servers securely. I’ll soon make a guide about it.
For remote MCP servers, you must also limit accessible resources, especially when self-hosting.
Remote frameworks integrate security constraints based on these risks:
Prompt injection & tool poisoning: Malicious prompts may call harmful MCP tools.
→ Some IDEs allow to blacklist certain MCP tools, or ask to confirm the actionCode injection: An MCP server running commands (e.g: filesystem) may run
rm -rf /instead of listing files, because a string wasn’t validated.
→ Sanitize stringsCredentials leakage: The token you pass to your MCP server may be leaked, exposed in a debug log.
→ Use MCP frameworks that support OAuth 2.1, JWT tokens, HMAC signatures.→ Log authentication/authorization/activity logs for traceability.
Over-permissioning: Follow the principle of least privilege: no resource should ever have more access that it needs to perform is intended tasks
→ Use Role-Based-Access-Control (RBAC)
→ Limit accessible resourcesEnsure tool integrity: Legitimate MCP servers can be spoofed. Without integrity validation, your daa can be sent to malicious substitute MCP servers.
→ Notify users whenever tools are updated or replaced.
→ Require certificate pinning for all TLS connections.
→ Block endpoints that do not pass TLS or metadata verification.
In the next parts of this article, we’ll see which frameworks comply with those requirements.
MCP use cases
Now that the basics are clear, we can review MCP servers main use cases:
Wrap an existing API: Expose third-party services (GitHub, Jira, Slack, AWS).
We’ll go through each step using Tadata, which generates MCP servers from OpenAPI specification files.
Framework adapter: Bridge orchestration or agent frameworks (CrewAI, LangGraph, LlamaIndex, OpenAI).
We’ll use auto-mcp for that usage.Connect to a remote host from a local-only MCP client:
Use mcp-remote, a CLI tool that enables existing MCP clients, like Cursor or Windsurf, to connect to remote servers.As I mentioned before, Streamable HTTP should be preferred over the SSE protocol. That’s exactly what mcp-remote does:
When runningmcp-remote https://my-mcp.example.commcp-remote tries the/mcpendpoint first. If it fails wih a 404, it fallbacks to the/sseendpoint.Custom logic: Implement domain-specific workflows or business rules from scratch. Let’s not reinvent the wheel, but rather use frameworks which have built-in OAuth 2.1 support:
Official TypeScript SDK for MCP: typescript-sdk
TypeScript FastMCP framework: punkpeye/fastmcp
Pythonic way to build MCP servers & clients: jlowin/fastmcp
For an easy-setup, if you use TypeScript, I recommend using cloudflare mcp servers templates, see cloudflare/ai/demos. We'll get to that later in the section below.
remote-mcp-google-oauth: Model Context Protocol (MCP) Server + Google OAuth
remote-mcp-auth0: Model Context Protocol (MCP) Server + Auth0
Use MCPs in a Python app: Need to use existing MCPs into your python app.
Use MCPs in a TypeScript app: You can use
mcp-clientto use any MCP servers in your JS app.
<span <span class="hljs-keyword">class</span>=<span class="hljs-string">"hljs-keyword"</span>><span class="hljs-keyword">import</span><<span class="hljs-regexp">/span> { <span class="hljs-title class_">MCPConnectionManager</</span>span> } <span <span class="hljs-keyword">class</span>=<span class="hljs-string">"hljs-keyword"</span>><span class="hljs-keyword">from</span><<span class="hljs-regexp">/span> <span class="hljs-string">&#x27;mcp-client&#x27;</</span>span>;
<span class="language-xml"><span class="hljs-tag"><<span class="hljs-name">span</span> <span class="hljs-attr">class</span>=<span class="hljs-string">"hljs-keyword"</span>></span>const<span class="hljs-tag"></<span class="hljs-name">span</span>></span></span> manager = <span class="language-xml"><span class="hljs-tag"><<span class="hljs-name">span</span> <span class="hljs-attr">class</span>=<span class="hljs-string">"hljs-keyword"</span>></span>new<span class="hljs-tag"></<span class="hljs-name">span</span>></span></span> <span class="language-xml"><span class="hljs-tag"><<span class="hljs-name">span</span> <span class="hljs-attr">class</span>=<span class="hljs-string">"hljs-title class_"</span>></span>MCPConnectionManager<span class="hljs-tag"></<span class="hljs-name">span</span>></span></span>();
<span class="language-xml"><span class="hljs-tag"><<span class="hljs-name">span</span> <span class="hljs-attr">class</span>=<span class="hljs-string">"hljs-keyword"</span>></span>await<span class="hljs-tag"></<span class="hljs-name">span</span>></span></span> manager.<span <span class="hljs-keyword">class</span>=<span class="hljs-string">"hljs-title function_"</span>>initialize<<span class="hljs-regexp">/span>(<span class="hljs-string">&#x27;./m</span>cp-config.<span class="hljs-property">json</span>&#x27;</span>);
<span class="language-xml"><span class="hljs-tag"><<span class="hljs-name">span</span> <span class="hljs-attr">class</span>=<span class="hljs-string">"hljs-keyword"</span>></span>const<span class="hljs-tag"></<span class="hljs-name">span</span>></span></span> client = manager.<span <span class="hljs-keyword">class</span>=<span class="hljs-string">"hljs-title function_"</span>>getClient<<span class="hljs-regexp">/span>(<span class="hljs-string">&#x27;memory&#x27;</</span>span>);
<span class="language-xml"><span class="hljs-tag"><<span class="hljs-name">span</span> <span class="hljs-attr">class</span>=<span class="hljs-string">"hljs-keyword"</span>></span>const<span class="hljs-tag"></<span class="hljs-name">span</span>></span></span> tools = <span class="language-xml"><span class="hljs-tag"><<span class="hljs-name">span</span> <span class="hljs-attr">class</span>=<span class="hljs-string">"hljs-keyword"</span>></span>await<span class="hljs-tag"></<span class="hljs-name">span</span>></span></span> client?.<span <span class="hljs-keyword">class</span>=<span class="hljs-string">"hljs-title function_"</span>>listTools</span>();
<span class="language-xml"><span class="hljs-tag"><<span class="hljs-name">span</span> <span class="hljs-attr">class</span>=<span class="hljs-string">"hljs-keyword"</span>></span>const<span class="hljs-tag"></<span class="hljs-name">span</span>></span></span> result = <span class="language-xml"><span class="hljs-tag"><<span class="hljs-name">span</span> <span class="hljs-attr">class</span>=<span class="hljs-string">"hljs-keyword"</span>></span>await<span class="hljs-tag"></<span class="hljs-name">span</span>></span></span> client?.<span <span class="hljs-keyword">class</span>=<span class="hljs-string">"hljs-title function_"</span>>callTool<<span class="hljs-regexp">/span>(<span class="hljs-string">&#x27;toolName&#x27;</</span>span>, { <span class="language-xml"><span class="hljs-tag"><<span class="hljs-name">span</span> <span class="hljs-attr">class</span>=<span class="hljs-string">"hljs-comment"</span>></span>/* params */<span class="hljs-tag"></<span class="hljs-name">span</span>></span></span> });
<span class="language-xml"><span class="hljs-tag"><<span class="hljs-name">span</span> <span class="hljs-attr">class</span>=<span class="hljs-string">"hljs-keyword"</span>></span>await<span class="hljs-tag"></<span class="hljs-name">span</span>></span></span> manager.<span <span class="hljs-keyword">class</span>=<span class="hljs-string">"hljs-title function_"</span>>cleanup</span>();- Proxy/gateway: Aggregate multiple services or enforce access policies. The major tools MCP gateways are:
Unla MCP Gateway: A lightweight gateway service that instantly transforms existing MCP Servers and APIs into MCP servers with zero code changes. Features Docker deployment and management UI, requiring no infrastructure modifications.
Microsoft MCP gateway: reverse proxy and management layer for MCP servers, enabling scalable, session-aware routing and lifecycle management of MCP servers in Kubernetes environments.
You know have a broader view on the MCP ecosystem. Now, let’s create your first MPC server ⬇️
Build & deploy MCP servers for Cloudflare Workers
I suggest using the Cloudflare MCP servers templates, which support OAuth and Streamable-HTTP. They come both in Typescript and Python version, although the Python version cannot be deployed using the Free plan as it goes beyond the size limit. We’ll see another pythonic way in the next secion to share a MCP server.
Streamable-HTTP has been recently added in Cloudflare templates through the /mcp endpoint:

/sse endpoint is kept as fallback, but if it’s being used by using mcp-outline —sse-first <your_mcp_server_url> then your costs may rise high. Hence I suggest to just remove it, which will throw a 404 automatically.
Start to build your TypeScript-based MCP-Server using Cloudflare Wokers
Let’s say you want your organization members to connect to your custom MCP. If using Google Workspace, you need Google OAuth, if using Auth0, you need Auth0 Oauth, etc.
Pick the template that suits your use-case, then run:
npm create cloudflare@latest -- my-mcp-server-google-auth --template=cloudflare/ai/demos/remote-mcp-google-oauth <span class=<span class="hljs-string">"hljs-built_in"</span>><span class="hljs-built_in">cd</span></span> my-mcp-server-google-auth npx wrangler@latest deployThe main difference between google and github templates are actually located in the src/index.ts file, where the defaultHandler is set to the GithubHandler:
<span <span class="hljs-keyword">class</span>=<span class="hljs-string">"hljs-keyword"</span>><span class="hljs-keyword">import</span><<span class="hljs-regexp">/span> <span class="hljs-title class_">GitHubHandler</</span>span> <span class="language-xml"><span class="hljs-tag"><<span class="hljs-name">span</span> <span class="hljs-attr">class</span>=<span class="hljs-string">"hljs-keyword"</span>></span>from<span class="hljs-tag"></<span class="hljs-name">span</span>></span></span> <span class="language-xml"><span class="hljs-tag"><<span class="hljs-name">span</span> <span class="hljs-attr">class</span>=<span class="hljs-string">"hljs-string"</span>></span><span class="hljs-symbol">&quot;</span>./github-handler<span class="hljs-symbol">&quot;</span><span class="hljs-tag"></<span class="hljs-name">span</span>></span></span>;
<span class="language-xml"><span class="hljs-tag"><<span class="hljs-name">span</span> <span class="hljs-attr">class</span>=<span class="hljs-string">"hljs-keyword"</span>></span>export<span class="hljs-tag"></<span class="hljs-name">span</span>></span></span> <span class="language-xml"><span class="hljs-tag"><<span class="hljs-name">span</span> <span class="hljs-attr">class</span>=<span class="hljs-string">"hljs-keyword"</span>></span>default<span class="hljs-tag"></<span class="hljs-name">span</span>></span></span> <span class="language-xml"><span class="hljs-tag"><<span class="hljs-name">span</span> <span class="hljs-attr">class</span>=<span class="hljs-string">"hljs-keyword"</span>></span>new<span class="hljs-tag"></<span class="hljs-name">span</span>></span></span> <span class="language-xml"><span class="hljs-tag"><<span class="hljs-name">span</span> <span class="hljs-attr">class</span>=<span class="hljs-string">"hljs-title class_"</span>></span>OAuthProvider<span class="hljs-tag"></<span class="hljs-name">span</span>></span></span>({
<span class="language-xml"><span class="hljs-tag"><<span class="hljs-name">span</span> <span class="hljs-attr">class</span>=<span class="hljs-string">"hljs-attr"</span>></span>apiHandlers<span class="hljs-tag"></<span class="hljs-name">span</span>></span></span>: {
<span class="language-xml"><span class="hljs-tag"><<span class="hljs-name">span</span> <span class="hljs-attr">class</span>=<span class="hljs-string">"hljs-comment"</span>></span>// Deprecated SSE protocol - use /mcp instead<span class="hljs-tag"></<span class="hljs-name">span</span>></span></span>
<span class="language-xml"><span class="hljs-tag"><<span class="hljs-name">span</span> <span class="hljs-attr">class</span>=<span class="hljs-string">"hljs-string"</span>></span><span class="hljs-symbol">&quot;</span>/sse<span class="hljs-symbol">&quot;</span><span class="hljs-tag"></<span class="hljs-name">span</span>></span></span>: <span class="language-xml"><span class="hljs-tag"><<span class="hljs-name">span</span> <span class="hljs-attr">class</span>=<span class="hljs-string">"hljs-title class_"</span>></span>MyMCP<span class="hljs-tag"></<span class="hljs-name">span</span>></span></span>.<span <span class="hljs-keyword">class</span>=<span class="hljs-string">"hljs-title function_"</span>>serveSSE<<span class="hljs-regexp">/span>(<span class="hljs-string">&quot;/</span>sse&quot;</span>),
<span class="language-xml"><span class="hljs-tag"><<span class="hljs-name">span</span> <span class="hljs-attr">class</span>=<span class="hljs-string">"hljs-string"</span>></span><span class="hljs-symbol">&quot;</span>/mcp<span class="hljs-symbol">&quot;</span><span class="hljs-tag"></<span class="hljs-name">span</span>></span></span>: <span class="language-xml"><span class="hljs-tag"><<span class="hljs-name">span</span> <span class="hljs-attr">class</span>=<span class="hljs-string">"hljs-title class_"</span>></span>MyMCP<span class="hljs-tag"></<span class="hljs-name">span</span>></span></span>.<span <span class="hljs-keyword">class</span>=<span class="hljs-string">"hljs-title function_"</span>>serve<<span class="hljs-regexp">/span>(<span class="hljs-string">&quot;mcp&quot;</</span>span>) <span <span class="hljs-keyword">class</span>=<span class="hljs-string">"hljs-comment"</span>><span class="hljs-comment">// Streamable-HTTP protocol</span></span>
},
<span class="language-xml"><span class="hljs-tag"><<span class="hljs-name">span</span> <span class="hljs-attr">class</span>=<span class="hljs-string">"hljs-attr"</span>></span>defaultHandler<span class="hljs-tag"></<span class="hljs-name">span</span>></span></span>: <span class="language-xml"><span class="hljs-tag"><<span class="hljs-name">span</span> <span class="hljs-attr">class</span>=<span class="hljs-string">"hljs-title class_"</span>></span>GitHubHandler<span class="hljs-tag"></<span class="hljs-name">span</span>></span></span>,
<span class="language-xml"><span class="hljs-tag"><<span class="hljs-name">span</span> <span class="hljs-attr">class</span>=<span class="hljs-string">"hljs-attr"</span>></span>authorizeEndpoint<span class="hljs-tag"></<span class="hljs-name">span</span>></span></span>: <span class="language-xml"><span class="hljs-tag"><<span class="hljs-name">span</span> <span class="hljs-attr">class</span>=<span class="hljs-string">"hljs-string"</span>></span><span class="hljs-symbol">&quot;</span>/authorize<span class="hljs-symbol">&quot;</span><span class="hljs-tag"></<span class="hljs-name">span</span>></span></span>,
<span class="language-xml"><span class="hljs-tag"><<span class="hljs-name">span</span> <span class="hljs-attr">class</span>=<span class="hljs-string">"hljs-attr"</span>></span>tokenEndpoint<span class="hljs-tag"></<span class="hljs-name">span</span>></span></span>: <span class="language-xml"><span class="hljs-tag"><<span class="hljs-name">span</span> <span class="hljs-attr">class</span>=<span class="hljs-string">"hljs-string"</span>></span><span class="hljs-symbol">&quot;</span>/token<span class="hljs-symbol">&quot;</span><span class="hljs-tag"></<span class="hljs-name">span</span>></span></span>,
<span class="language-xml"><span class="hljs-tag"><<span class="hljs-name">span</span> <span class="hljs-attr">class</span>=<span class="hljs-string">"hljs-attr"</span>></span>clientRegistrationEndpoint<span class="hljs-tag"></<span class="hljs-name">span</span>></span></span>: <span class="language-xml"><span class="hljs-tag"><<span class="hljs-name">span</span> <span class="hljs-attr">class</span>=<span class="hljs-string">"hljs-string"</span>></span><span class="hljs-symbol">&quot;</span>/register<span class="hljs-symbol">&quot;</span><span class="hljs-tag"></<span class="hljs-name">span</span>></span></span>
});You need to create a Google OAuth app to use Google as an IdP (identity provider): one for local development, and one for production.
Go to Google Cloud Console
Navigate to APIs & Services → OAuth consent screen → configure name, email, scopes.
Go to Credentials → Create Credentials → OAuth Client ID.
Choose Web Application.
Add Authorized redirect URIs:
Set the secrets locally:
<span <span class="hljs-keyword">class</span>=<span class="hljs-string">"hljs-comment"</span>><span class="hljs-comment">// .dev.vars</span></span> <span class="language-xml"><span class="hljs-tag"><<span class="hljs-name">span</span> <span class="hljs-attr">class</span>=<span class="hljs-string">"hljs-variable constant_"</span>></span>GOOGLE_CLIENT_ID<span class="hljs-tag"></<span class="hljs-name">span</span>></span></span>=<span class="language-xml"><span class="hljs-tag"><<span class="hljs-name">span</span> <span class="hljs-attr">class</span>=<span class="hljs-string">"hljs-string"</span>></span><span class="hljs-symbol">&quot;</span>your-client-id<span class="hljs-symbol">&quot;</span><span class="hljs-tag"></<span class="hljs-name">span</span>></span></span> <span class="language-xml"><span class="hljs-tag"><<span class="hljs-name">span</span> <span class="hljs-attr">class</span>=<span class="hljs-string">"hljs-variable constant_"</span>></span>GOOGLE_CLIENT_SECRET<span class="hljs-tag"></<span class="hljs-name">span</span>></span></span>=<span class="language-xml"><span class="hljs-tag"><<span class="hljs-name">span</span> <span class="hljs-attr">class</span>=<span class="hljs-string">"hljs-string"</span>></span><span class="hljs-symbol">&quot;</span>your-client-secret<span class="hljs-symbol">&quot;</span><span class="hljs-tag"></<span class="hljs-name">span</span>></span></span>Run & test locally
npm startThis serves your MCP server on
http://localhost:8788/sseDebug the MCP server (local & remote)
Use MCP Inspector, an interactive MC client that lists discovered tools and invoke them from a web browser.
npx @modelcontextprotocol/inspector@latestGo to http://localhost:5173. In the inspector, enter the URL of your MCP server,
http://localhost:8788/sse, and click Connect.
You should be redirected to a GitHub authorization page. Once authorized, you're redirected to the inspector and can list & invoke tools.Run remotely
If you don’t have a Cloudflare account, you must create one. Use the free plan. Then install wrangler and login.
Now, configure secrets & deploy your MCP server to Cloudflare Workers (serverless):<span class=<span class="hljs-string">"hljs-comment"</span>># Configure global secrets</span> wrangler secret put -e production HCAPTCHA_SITE_KEY wrangler secret put -e production GITHUB_CLIENT_SECRET <span class=<span class="hljs-string">"hljs-comment"</span>># Deploy</span> wrangler deploy -e productionConfigure your IDE to use the remote MCP Server
claude_desktop_config.json{ <span class=<span class="hljs-string">"hljs-string"</span>>&quot;mcpServers&quot;</span>: { <span class=<span class="hljs-string">"hljs-string"</span>>&quot;my_cloudflare_worker_mcp&quot;</span>: { <span class=<span class="hljs-string">"hljs-string"</span>>&quot;<span class="hljs-built_in">command</span>&quot;</span>: <span class=<span class="hljs-string">"hljs-string"</span>>&quot;npx&quot;</span>, <span class=<span class="hljs-string">"hljs-string"</span>>&quot;args&quot;</span>: [<span class=<span class="hljs-string">"hljs-string"</span>>&quot;mcp-remote&quot;</span>,<span class=<span class="hljs-string">"hljs-string"</span>>&quot;https://worker-name.account-name.workers.dev&quot;</span>] } } }
Build Python MCP servers with FastMCP
For a more feature-rich experience, you can use jlowin/fastmcp, which offers additional features and a more pythonic approach.
Start by adding FastMCP as a dependency:
uv add fastmcp
<span class=<span class="hljs-string">"hljs-comment"</span>># or use uv pip install fastmcp</span>Create a FastMCP server by instantiating the FastMCP class. Create a server.py file:
<span <span class="hljs-keyword">class</span>=<span class="hljs-string">"hljs-keyword"</span>><span class="hljs-keyword">from</span></span> fastmcp <span <span class="hljs-keyword">class</span>=<span class="hljs-string">"hljs-keyword"</span>><span class="hljs-keyword">import</span></span> FastMCP, Tool <span <span class="hljs-keyword">class</span>=<span class="hljs-string">"hljs-comment"</span>><span class="hljs-comment"># FastMCP 2.0 syntax</span></span>
mcp = FastMCP(<span <span class="hljs-keyword">class</span>=<span class="hljs-string">"hljs-string"</span>>&quot;DocumentMCP&quot;</span>)To add a tool, write a function and decorate it with @mcp.tool to register it with the MCP server.
Let’s implement a tool that reads a document based on a doc_id param. We validate the parameter using pydantic:
<span <span class="hljs-keyword">class</span>=<span class="hljs-string">"hljs-keyword"</span>><span class="hljs-keyword">from</span></span> fastmcp <span <span class="hljs-keyword">class</span>=<span class="hljs-string">"hljs-keyword"</span>><span class="hljs-keyword">import</span></span> FastMCP, Tool <span <span class="hljs-keyword">class</span>=<span class="hljs-string">"hljs-comment"</span>><span class="hljs-comment"># FastMCP 2.0 syntax</span></span>
<span <span class="hljs-keyword">class</span>=<span class="hljs-string">"hljs-keyword"</span>><span class="hljs-keyword">from</span></span> pydantic <span <span class="hljs-keyword">class</span>=<span class="hljs-string">"hljs-keyword"</span>><span class="hljs-keyword">import</span></span> BaseModel, Field
<span <span class="hljs-keyword">class</span>=<span class="hljs-string">"hljs-keyword"</span>><span class="hljs-keyword">class</span></span> <span <span class="hljs-keyword">class</span>=<span class="hljs-string">"hljs-title class_"</span>>DocumentQuery</span>(<span <span class="hljs-keyword">class</span>=<span class="hljs-string">"hljs-title class_ inherited__"</span>>BaseModel</span>):
doc_id: <span <span class="hljs-keyword">class</span>=<span class="hljs-string">"hljs-built_in"</span>><span class="hljs-built_in">str</span></span> = Field(description=<span <span class="hljs-keyword">class</span>=<span class="hljs-string">"hljs-string"</span>>&quot;ID of the document to retrieve&quot;</span>)
mcp = FastMCP(<span <span class="hljs-keyword">class</span>=<span class="hljs-string">"hljs-string"</span>>&quot;DocumentMCP&quot;</span>)
<span <span class="hljs-keyword">class</span>=<span class="hljs-string">"hljs-meta"</span>>@mcp.tool</span>
<span <span class="hljs-keyword">class</span>=<span class="hljs-string">"hljs-keyword"</span>><span class="hljs-keyword">def</span></span> <span <span class="hljs-keyword">class</span>=<span class="hljs-string">"hljs-title function_"</span>>read_document</span>(<span <span class="hljs-keyword">class</span>=<span class="hljs-string">"hljs-params"</span>>query: DocumentQuery</span>) -&gt; <span <span class="hljs-keyword">class</span>=<span class="hljs-string">"hljs-built_in"</span>><span class="hljs-built_in">str</span></span>:
<span <span class="hljs-keyword">class</span>=<span class="hljs-string">"hljs-string"</span>>&quot;&quot;&quot;
Read the contents of a document <span class="hljs-keyword">and</span> <span class="hljs-keyword">return</span> it <span class="hljs-keyword">as</span> a string.
&quot;&quot;&quot;</span>
<span <span class="hljs-keyword">class</span>=<span class="hljs-string">"hljs-comment"</span>><span class="hljs-comment"># Implementation here</span></span>
<span <span class="hljs-keyword">class</span>=<span class="hljs-string">"hljs-keyword"</span>><span class="hljs-keyword">return</span></span> <span <span class="hljs-keyword">class</span>=<span class="hljs-string">"hljs-string"</span>>f&quot;Content of document <span <span class="hljs-keyword">class</span>=<span class="hljs-string">"hljs-subst"</span>>{query.doc_id}</span>&quot;</span>
<span <span class="hljs-keyword">class</span>=<span class="hljs-string">"hljs-keyword"</span>><span class="hljs-keyword">if</span></span> __name__ == <span <span class="hljs-keyword">class</span>=<span class="hljs-string">"hljs-string"</span>>&quot;__main__&quot;</span>:
mcp.run() <span <span class="hljs-keyword">class</span>=<span class="hljs-string">"hljs-comment"</span>><span class="hljs-comment"># Uses STDIO transport by default</span></span>Use Streamable HTTP
Your MCP servers is local only by default as it uses Standard IO (stidio) protocol. Replace that with Streamable HTTP:
mcp.run(transport=<span <span class="hljs-keyword">class</span>=<span class="hljs-string">"hljs-string"</span>>&quot;http&quot;</span>, host=<span <span class="hljs-keyword">class</span>=<span class="hljs-string">"hljs-string"</span>>&quot;<span class="hljs-number">127.0</span><span class="hljs-number">.0</span><span class="hljs-number">.1</span>&quot;</span>, port=<span <span class="hljs-keyword">class</span>=<span class="hljs-string">"hljs-number"</span>><span class="hljs-number">8000</span></span>)Run your application with FastMCP CLI:
fastmcp run server.pyYour server is now accessible at http://localhost:8000/mcp/.
Use run_async() inside async functions
mcp.run() is actually a synchronous wrapper around our async logic.
If your application is already running in an async context, use run_async():
from fastmcp import FastMCP
import asyncio
mcp = FastMCP(name=<span class=<span class="hljs-string">"hljs-string"</span>>&quot;MyServer&quot;</span>)
@mcp.tool
def hello(name: str) -&gt; str:
<span class=<span class="hljs-string">"hljs-built_in"</span>><span class="hljs-built_in">return</span></span> f<span class=<span class="hljs-string">"hljs-string"</span>>&quot;Hello, {name}!&quot;</span>
async def main():
<span class=<span class="hljs-string">"hljs-comment"</span>># Use run_async() <span class="hljs-keyword">in</span> async contexts</span>
await mcp.run_async(transport=<span class=<span class="hljs-string">"hljs-string"</span>>&quot;http&quot;</span>, port=8000)
<span class=<span class="hljs-string">"hljs-keyword"</span>><span class="hljs-keyword">if</span></span> __name__ == <span class=<span class="hljs-string">"hljs-string"</span>>&quot;__main__&quot;</span>:
asyncio.run(main())Add unit tests
To test your MCP server, create a pytest unit test file in tests/test_server.py that:
Instanciates a
Clientfrom our MCP. Clients are asynchronous, so we need to useasyncio.runto run the client.To use the client we must enter a client context with
async with client:
Run unit tests by running pytest.
<span <span class="hljs-keyword">class</span>=<span class="hljs-string">"hljs-keyword"</span>><span class="hljs-keyword">import</span></span> pytest
<span <span class="hljs-keyword">class</span>=<span class="hljs-string">"hljs-keyword"</span>><span class="hljs-keyword">import</span></span> asyncio
<span <span class="hljs-keyword">class</span>=<span class="hljs-string">"hljs-keyword"</span>><span class="hljs-keyword">from</span></span> fastmcp <span <span class="hljs-keyword">class</span>=<span class="hljs-string">"hljs-keyword"</span>><span class="hljs-keyword">import</span></span> Client
<span <span class="hljs-keyword">class</span>=<span class="hljs-string">"hljs-keyword"</span>><span class="hljs-keyword">from</span></span> server <span <span class="hljs-keyword">class</span>=<span class="hljs-string">"hljs-keyword"</span>><span class="hljs-keyword">import</span></span> mcp
<span <span class="hljs-keyword">class</span>=<span class="hljs-string">"hljs-meta"</span>>@pytest.mark.asyncio</span>
<span <span class="hljs-keyword">class</span>=<span class="hljs-string">"hljs-keyword"</span>><span class="hljs-keyword">async</span></span> <span <span class="hljs-keyword">class</span>=<span class="hljs-string">"hljs-keyword"</span>><span class="hljs-keyword">def</span></span> <span <span class="hljs-keyword">class</span>=<span class="hljs-string">"hljs-title function_"</span>>test_read_document</span>():
client = Client(mcp)
<span <span class="hljs-keyword">class</span>=<span class="hljs-string">"hljs-keyword"</span>><span class="hljs-keyword">async</span></span> <span <span class="hljs-keyword">class</span>=<span class="hljs-string">"hljs-keyword"</span>><span class="hljs-keyword">with</span></span> client:
result = <span <span class="hljs-keyword">class</span>=<span class="hljs-string">"hljs-keyword"</span>><span class="hljs-keyword">await</span></span> client.call_tool(<span <span class="hljs-keyword">class</span>=<span class="hljs-string">"hljs-string"</span>>&quot;read_document&quot;</span>, {<span <span class="hljs-keyword">class</span>=<span class="hljs-string">"hljs-string"</span>>&quot;doc_id&quot;</span>: <span <span class="hljs-keyword">class</span>=<span class="hljs-string">"hljs-string"</span>>&quot;<span class="hljs-number">123</span>&quot;</span>})
<span <span class="hljs-keyword">class</span>=<span class="hljs-string">"hljs-keyword"</span>><span class="hljs-keyword">assert</span></span> <span <span class="hljs-keyword">class</span>=<span class="hljs-string">"hljs-string"</span>>&quot;Content of document <span class="hljs-number">123</span>&quot;</span> <span <span class="hljs-keyword">class</span>=<span class="hljs-string">"hljs-keyword"</span>><span class="hljs-keyword">in</span></span> resultAdd explicit error feedback
Handle errors by returning JSON-RCP error codes:
<span <span class="hljs-keyword">class</span>=<span class="hljs-string">"hljs-meta"</span>>@mcp.tool</span>
<span <span class="hljs-keyword">class</span>=<span class="hljs-string">"hljs-keyword"</span>><span class="hljs-keyword">def</span></span> <span <span class="hljs-keyword">class</span>=<span class="hljs-string">"hljs-title function_"</span>>update_document</span>(<span <span class="hljs-keyword">class</span>=<span class="hljs-string">"hljs-params"</span>>
doc_id: <span <span class="hljs-keyword">class</span>=<span class="hljs-string">"hljs-built_in"</span>><span class="hljs-built_in">str</span></span> = Field(<span <span class="hljs-keyword">class</span>=<span class="hljs-string">"hljs-params"</span>>description=<span <span class="hljs-keyword">class</span>=<span class="hljs-string">"hljs-string"</span>>&quot;ID of the document to update&quot;</span></span>),
content: <span <span class="hljs-keyword">class</span>=<span class="hljs-string">"hljs-built_in"</span>><span class="hljs-built_in">str</span></span> = Field(<span <span class="hljs-keyword">class</span>=<span class="hljs-string">"hljs-params"</span>>description=<span <span class="hljs-keyword">class</span>=<span class="hljs-string">"hljs-string"</span>>&quot;New content <span class="hljs-keyword">for</span> the document&quot;</span></span>)
</span>):
<span <span class="hljs-keyword">class</span>=<span class="hljs-string">"hljs-keyword"</span>><span class="hljs-keyword">try</span></span>:
<span <span class="hljs-keyword">class</span>=<span class="hljs-string">"hljs-comment"</span>><span class="hljs-comment"># Implementation here</span></span>
<span <span class="hljs-keyword">class</span>=<span class="hljs-string">"hljs-keyword"</span>><span class="hljs-keyword">return</span></span> {<span <span class="hljs-keyword">class</span>=<span class="hljs-string">"hljs-string"</span>>&quot;success&quot;</span>: <span <span class="hljs-keyword">class</span>=<span class="hljs-string">"hljs-literal"</span>><span class="hljs-literal">True</span></span>, <span <span class="hljs-keyword">class</span>=<span class="hljs-string">"hljs-string"</span>>&quot;message&quot;</span>: <span <span class="hljs-keyword">class</span>=<span class="hljs-string">"hljs-string"</span>>f&quot;Document <span <span class="hljs-keyword">class</span>=<span class="hljs-string">"hljs-subst"</span>>{doc_id}</span> updated successfully&quot;</span>}
<span <span class="hljs-keyword">class</span>=<span class="hljs-string">"hljs-keyword"</span>><span class="hljs-keyword">except</span></span> KeyError:
<span <span class="hljs-keyword">class</span>=<span class="hljs-string">"hljs-comment"</span>><span class="hljs-comment"># Return a structured error response</span></span>
<span <span class="hljs-keyword">class</span>=<span class="hljs-string">"hljs-keyword"</span>><span class="hljs-keyword">return</span></span> {
<span <span class="hljs-keyword">class</span>=<span class="hljs-string">"hljs-string"</span>>&quot;error&quot;</span>: {
<span <span class="hljs-keyword">class</span>=<span class="hljs-string">"hljs-string"</span>>&quot;code&quot;</span>: -<span <span class="hljs-keyword">class</span>=<span class="hljs-string">"hljs-number"</span>><span class="hljs-number">32003</span></span>,
<span <span class="hljs-keyword">class</span>=<span class="hljs-string">"hljs-string"</span>>&quot;message&quot;</span>: <span <span class="hljs-keyword">class</span>=<span class="hljs-string">"hljs-string"</span>>f&quot;Document <span class="hljs-keyword">with</span> ID <span <span class="hljs-keyword">class</span>=<span class="hljs-string">"hljs-subst"</span>>{doc_id}</span> <span class="hljs-keyword">not</span> found&quot;</span>,
<span <span class="hljs-keyword">class</span>=<span class="hljs-string">"hljs-string"</span>>&quot;data&quot;</span>: {<span <span class="hljs-keyword">class</span>=<span class="hljs-string">"hljs-string"</span>>&quot;requested_id&quot;</span>: doc_id}
}
}Package your Python MCP Server
To make your MCP server easily shareable, you can package it as a Python package:
- Create an
__init__.pymodule file:
<span <span class="hljs-keyword">class</span>=<span class="hljs-string">"hljs-comment"</span>><span class="hljs-comment"># src/my_custom_mcp/__init__.py</span></span> <span <span class="hljs-keyword">class</span>=<span class="hljs-string">"hljs-keyword"</span>><span class="hljs-keyword">from</span></span> .server <span <span class="hljs-keyword">class</span>=<span class="hljs-string">"hljs-keyword"</span>><span class="hljs-keyword">import</span></span> mcpDefine your package metadata in
pyproject.tomlBuild and publish:
pip install build python -m build <span <span class="hljs-keyword">class</span>=<span class="hljs-string">"hljs-comment"</span>><span class="hljs-comment"># Use Twine, a utility to publish to PyPI</span></span> pip install twine <span <span class="hljs-keyword">class</span>=<span class="hljs-string">"hljs-comment"</span>><span class="hljs-comment"># Publish to PyPI (this will ask for a PyPI API token)</span></span> twine upload dist/*Users can then integrate your package with their IDE:
claude_desktop_config.json{ <span <span class="hljs-keyword">class</span>=<span class="hljs-string">"hljs-string"</span>>&quot;mcpServers&quot;</span>: { <span <span class="hljs-keyword">class</span>=<span class="hljs-string">"hljs-string"</span>>&quot;my_custom_mcp&quot;</span>: { <span <span class="hljs-keyword">class</span>=<span class="hljs-string">"hljs-string"</span>>&quot;command&quot;</span>: <span <span class="hljs-keyword">class</span>=<span class="hljs-string">"hljs-string"</span>>&quot;uvx&quot;</span>, <span <span class="hljs-keyword">class</span>=<span class="hljs-string">"hljs-string"</span>>&quot;args&quot;</span>: [ <span <span class="hljs-keyword">class</span>=<span class="hljs-string">"hljs-string"</span>>&quot;server&quot;</span> ] } } }
Add Health Checks
To monitor your MCP server, you can add health endpoints through FastMCP custom routes:
<span <span class="hljs-keyword">class</span>=<span class="hljs-string">"hljs-keyword"</span>><span class="hljs-keyword">from</span></span> starlette.responses <span <span class="hljs-keyword">class</span>=<span class="hljs-string">"hljs-keyword"</span>><span class="hljs-keyword">import</span></span> JSONResponse
<span <span class="hljs-keyword">class</span>=<span class="hljs-string">"hljs-meta"</span>>@mcp.custom_route(<span <span class="hljs-keyword">class</span>=<span class="hljs-string">"hljs-params"</span>><span <span class="hljs-keyword">class</span>=<span class="hljs-string">"hljs-string"</span>>&quot;/health&quot;</span>, methods=[<span <span class="hljs-keyword">class</span>=<span class="hljs-string">"hljs-string"</span>>&quot;GET&quot;</span>]</span>)</span>
<span <span class="hljs-keyword">class</span>=<span class="hljs-string">"hljs-keyword"</span>><span class="hljs-keyword">async</span></span> <span <span class="hljs-keyword">class</span>=<span class="hljs-string">"hljs-keyword"</span>><span class="hljs-keyword">def</span></span> <span <span class="hljs-keyword">class</span>=<span class="hljs-string">"hljs-title function_"</span>>health_check</span>(<span <span class="hljs-keyword">class</span>=<span class="hljs-string">"hljs-params"</span>>request</span>):
<span <span class="hljs-keyword">class</span>=<span class="hljs-string">"hljs-keyword"</span>><span class="hljs-keyword">return</span></span> JSONResponse({<span <span class="hljs-keyword">class</span>=<span class="hljs-string">"hljs-string"</span>>&quot;status&quot;</span>: <span <span class="hljs-keyword">class</span>=<span class="hljs-string">"hljs-string"</span>>&quot;healthy&quot;</span>, <span <span class="hljs-keyword">class</span>=<span class="hljs-string">"hljs-string"</span>>&quot;service&quot;</span>: <span <span class="hljs-keyword">class</span>=<span class="hljs-string">"hljs-string"</span>>&quot;mcp-server&quot;</span>})This serves the health endpoint http://localhost:8000/health and can be used to restart your server in case of failure.
Add auhentication
If your MCP server is available remotely, you must add authentication. This can be done very easily with FastMCP, which supports OAuth, Bearer tokens and JWT.
To implement OAuth 2.1 we’re gonna use the RemoteAuthProvider to authenticate to Auth0. This will:
Add well known endpoints
/{ISSUER}/.well-known/jwks.jsonUse proper CORS configuration based on OAuth provider
Note: I see that tadata made the fastapi_mcp library to implement those changes.
Please keep relying on fastmcp library only, following the framework standards.
A minimal implementation looks like this:
<span <span class="hljs-keyword">class</span>=<span class="hljs-string">"hljs-keyword"</span>><span class="hljs-keyword">from</span></span> fastmcp <span <span class="hljs-keyword">class</span>=<span class="hljs-string">"hljs-keyword"</span>><span class="hljs-keyword">import</span></span> FastMCP
<span <span class="hljs-keyword">class</span>=<span class="hljs-string">"hljs-keyword"</span>><span class="hljs-keyword">from</span></span> fastmcp.server.auth <span <span class="hljs-keyword">class</span>=<span class="hljs-string">"hljs-keyword"</span>><span class="hljs-keyword">import</span></span> RemoteAuthProvider
<span <span class="hljs-keyword">class</span>=<span class="hljs-string">"hljs-keyword"</span>><span class="hljs-keyword">from</span></span> fastmcp.server.auth.providers.jwt <span <span class="hljs-keyword">class</span>=<span class="hljs-string">"hljs-keyword"</span>><span class="hljs-keyword">import</span></span> JWTVerifier
<span <span class="hljs-keyword">class</span>=<span class="hljs-string">"hljs-keyword"</span>><span class="hljs-keyword">from</span></span> pydantic <span <span class="hljs-keyword">class</span>=<span class="hljs-string">"hljs-keyword"</span>><span class="hljs-keyword">import</span></span> AnyHttpUrl
<span <span class="hljs-keyword">class</span>=<span class="hljs-string">"hljs-keyword"</span>><span class="hljs-keyword">import</span></span> os
AUTH0_DOMAIN = os.getenv(<span <span class="hljs-keyword">class</span>=<span class="hljs-string">"hljs-string"</span>>&quot;AUTH0_DOMAIN&quot;</span>, <span <span class="hljs-keyword">class</span>=<span class="hljs-string">"hljs-string"</span>>&quot;your-tenant.us.auth0.com&quot;</span>)
AUTH0_AUDIENCE = os.getenv(<span <span class="hljs-keyword">class</span>=<span class="hljs-string">"hljs-string"</span>>&quot;AUTH0_AUDIENCE&quot;</span>, <span <span class="hljs-keyword">class</span>=<span class="hljs-string">"hljs-string"</span>>&quot;https://your-api-identifier&quot;</span>)
RESOURCE_SERVER_URL = os.getenv(<span <span class="hljs-keyword">class</span>=<span class="hljs-string">"hljs-string"</span>>&quot;RESOURCE_SERVER_URL&quot;</span>, <span <span class="hljs-keyword">class</span>=<span class="hljs-string">"hljs-string"</span>>&quot;https://your-domain.example.com/mcp&quot;</span>)
<span <span class="hljs-keyword">class</span>=<span class="hljs-string">"hljs-comment"</span>><span class="hljs-comment"># Configure JWT verification</span></span>
token_verifier = JWTVerifier(
jwks_uri=<span <span class="hljs-keyword">class</span>=<span class="hljs-string">"hljs-string"</span>>f&quot;https://<span <span class="hljs-keyword">class</span>=<span class="hljs-string">"hljs-subst"</span>>{AUTH0_DOMAIN}</span>/.well-known/jwks.json&quot;</span>,
issuer=<span <span class="hljs-keyword">class</span>=<span class="hljs-string">"hljs-string"</span>>f&quot;https://<span <span class="hljs-keyword">class</span>=<span class="hljs-string">"hljs-subst"</span>>{AUTH0_DOMAIN}</span>/&quot;</span>,
audience=AUTH0_AUDIENCE
)
<span <span class="hljs-keyword">class</span>=<span class="hljs-string">"hljs-comment"</span>><span class="hljs-comment"># Wire OAuth to MCP</span></span>
auth = RemoteAuthProvider(
token_verifier=token_verifier,
authorization_servers=[AnyHttpUrl(<span <span class="hljs-keyword">class</span>=<span class="hljs-string">"hljs-string"</span>>f&quot;https://<span <span class="hljs-keyword">class</span>=<span class="hljs-string">"hljs-subst"</span>>{AUTH0_DOMAIN}</span>/&quot;</span>)],
resource_server_url=RESOURCE_SERVER_URL
)
mcp = FastMCP(name=<span <span class="hljs-keyword">class</span>=<span class="hljs-string">"hljs-string"</span>>&quot;Protected MCP Server&quot;</span>, auth=auth)
<span <span class="hljs-keyword">class</span>=<span class="hljs-string">"hljs-meta"</span>>@mcp.tool</span>
<span <span class="hljs-keyword">class</span>=<span class="hljs-string">"hljs-keyword"</span>><span class="hljs-keyword">def</span></span> <span <span class="hljs-keyword">class</span>=<span class="hljs-string">"hljs-title function_"</span>>hello</span>(<span <span class="hljs-keyword">class</span>=<span class="hljs-string">"hljs-params"</span>>name: <span <span class="hljs-keyword">class</span>=<span class="hljs-string">"hljs-built_in"</span>><span class="hljs-built_in">str</span></span></span>) -&gt; <span <span class="hljs-keyword">class</span>=<span class="hljs-string">"hljs-built_in"</span>><span class="hljs-built_in">str</span></span>:
<span <span class="hljs-keyword">class</span>=<span class="hljs-string">"hljs-keyword"</span>><span class="hljs-keyword">return</span></span> <span <span class="hljs-keyword">class</span>=<span class="hljs-string">"hljs-string"</span>>f&quot;Hello, <span <span class="hljs-keyword">class</span>=<span class="hljs-string">"hljs-subst"</span>>{name}</span>!&quot;</span>
<span <span class="hljs-keyword">class</span>=<span class="hljs-string">"hljs-keyword"</span>><span class="hljs-keyword">if</span></span> __name__ == <span <span class="hljs-keyword">class</span>=<span class="hljs-string">"hljs-string"</span>>&quot;__main__&quot;</span>:
mcp.run(transport=<span <span class="hljs-keyword">class</span>=<span class="hljs-string">"hljs-string"</span>>&quot;http&quot;</span>, host=<span <span class="hljs-keyword">class</span>=<span class="hljs-string">"hljs-string"</span>>&quot;<span class="hljs-number">0.0</span><span class="hljs-number">.0</span><span class="hljs-number">.0</span>&quot;</span>, port=<span <span class="hljs-keyword">class</span>=<span class="hljs-string">"hljs-number"</span>><span class="hljs-number">8000</span></span>)Configure an Auth0 application
Create Application in the Auth0 dashboard.
Register an API (your MCP server) with identifier matching
AUTH0_AUDIENCE.Enable OIDC Dynamic Client Registration.
Set Default Audience to your API identifier.
This ensures any MCP client can obtain tokens and authenticate correctly.
From Auth0 you can also enable Google Oauth.
In the Auth0 Dashboard, go to Authentication → Social → Google OAuth.
Under Applications, turn on the toggle for your application.
Save the changes.
Deploy your FastMCP server
Once Auth0 is configured:
Deploy the server to your hosting provider (e.g. Render, Fly.io, or your own infrastructure).
For example, go to Render, create a new web app and use its GitHub integration by connecting your repo.Set the environment variables (
AUTH0_DOMAIN,AUTH0_AUDIENCE,RESOURCE_SERVER_URL).
Your OAuth-protected MCP server is now live. Any MCP client that connects will be redirected through the OAuth flow, retrieve an access token, and then be able to call tools and resources securely.
Turn existing agents into MCP servers with auto-mcp
If you've built an app using an agent framework (CrewAI, OpenAI, etc.), you can use Naphta auto-mcp to create an adapter for your existing agent classes.
Note: If you’re using CrewAI, they offer direct MCP integration with the MCPServerAdapter from the crewai-tools, see this article from Plaban Nayak.
Let automcp generate a run_mcp.py file to configure your agent:
uv add naptha-automcp
automcp init -f &lt;framework&gt;
<span class=<span class="hljs-string">"hljs-comment"</span>># expected agent flag: crewai, langgraph, llamaindex, openai, pydantic, mcp_agent</span>Update the generated run_mcp.py file to use your agent class:
<span <span class="hljs-keyword">class</span>=<span class="hljs-string">"hljs-comment"</span>><span class="hljs-comment"># Replace these imports with your actual agent classes</span></span>
<span <span class="hljs-keyword">class</span>=<span class="hljs-string">"hljs-keyword"</span>><span class="hljs-keyword">from</span></span> your_module <span <span class="hljs-keyword">class</span>=<span class="hljs-string">"hljs-keyword"</span>><span class="hljs-keyword">import</span></span> YourCrewClass
<span <span class="hljs-keyword">class</span>=<span class="hljs-string">"hljs-comment"</span>><span class="hljs-comment"># Define the input schema</span></span>
<span <span class="hljs-keyword">class</span>=<span class="hljs-string">"hljs-keyword"</span>><span class="hljs-keyword">class</span></span> <span <span class="hljs-keyword">class</span>=<span class="hljs-string">"hljs-title class_"</span>>InputSchema</span>(<span <span class="hljs-keyword">class</span>=<span class="hljs-string">"hljs-title class_ inherited__"</span>>BaseModel</span>):
parameter1: <span <span class="hljs-keyword">class</span>=<span class="hljs-string">"hljs-built_in"</span>><span class="hljs-built_in">str</span></span>
parameter2: <span <span class="hljs-keyword">class</span>=<span class="hljs-string">"hljs-built_in"</span>><span class="hljs-built_in">str</span></span>
<span <span class="hljs-keyword">class</span>=<span class="hljs-string">"hljs-comment"</span>><span class="hljs-comment"># Set your agent details</span></span>
name = <span <span class="hljs-keyword">class</span>=<span class="hljs-string">"hljs-string"</span>>&quot;&lt;YOUR_AGENT_NAME&gt;&quot;</span>
description = <span <span class="hljs-keyword">class</span>=<span class="hljs-string">"hljs-string"</span>>&quot;&lt;YOUR_AGENT_DESCRIPTION&gt;&quot;</span>
<span <span class="hljs-keyword">class</span>=<span class="hljs-string">"hljs-comment"</span>><span class="hljs-comment"># For CrewAI projects</span></span>
mcp_crewai = create_crewai_adapter(
orchestrator_instance=YourCrewClass().crew(),
name=name,
description=description,
input_schema=InputSchema,
)Install dependencies and run your MCP server:
automcp serve -t sseYour MCP server is now up and provides one single MCP tool: Your agent.
Conclusion
We went through the Model Context Protocol (MPC) fundamentals and ecosystem.
It shifts the API-centric approach to an agent-interactive approach, in a goal-oriented paradigm.
This approach is less granular, but more goal-oriented, atomic tools being replaced with “recipe” meta-tools.
MCP servers can be written in any language, it’s just an implementation of a protocol. Just look for frameworks to handle the heavy-lifting, e.g: Cloudflare Workers templates for TypeScript, and FastMCP for Python.
Security and observability aren’t a nice-to-have, frameworks help you implement authentication, but you have to explicitly handle errors, and add traceability if your MCP is remote.
A few words about MCPs evolution
New tools appear, making curated MCP resources longer and longer.
Curated list of MCP tools, platforms & services: awesome-mcp-enterprise GitHub repo
Curated list of MCP servers: see awesome-mcp-servers GitHub repo
Security-centered MCP-Checklists
Best practices emerge and frameworks evolve, improving the overall quality of MCP servers and enforcing standards. Most MCP plugins are coded without frameworks, using tech stacks that are only “Claude” or “Windsurf” based, putting whole communities at risk with, see the article “We Uregntly Need Privilege Management in MCP: A Measurement of API Usage in MCP Ecosystems”.
I’d love to hear your go-to way for building MCP servers, and if they’re remote, how you share them and let your team use them?
Sources
Tori Seidenstein. APIs make bad MCPs. Start there anyway. tadata.com [online]. Available on: https://tadata.com/blog/apis-make-bad-mcps-start-there-anyway
Olha Diachuk. The DevOps view on MCP architecture. dysnic.com [online]. Available on:
https://dysnix.com/blog/mcp-architectureAraving Putrevu. How to host your MCP Server. Dev Shorts [online]. Exposing MCP Servers as APIs: Building Bridges Between AI Models and Applications. Available on: https://www.devshorts.in/p/how-to-host-your-mcp-server
Sanath Shetty. Exposing MCP Servers as APIs: Building Bridges Between AI Models and Applications. Medium [online]. Available on: https://medium.com/@sanathshetty444/exposing-mcp-servers-as-apis-building-bridges-between-ai-models-and-applications-104ff3803178
Maria Paktiti. The complete guide to MCP security: How to secure MCP servers & clients. workos.com [online]. Available on: https://workos.com/blog/mcp-security-risks-best-practices
Aravind Putrevu. How to implement OAuth for MCP Server. Dev Shorts [online]. Available on: https://www.devshorts.in/p/how-to-implement-oauth-for-mcp-server
More Articles

MCP servers - Introduction & Guide
In this article, I explain how MCPs (Model Context Protocols) work and how to integrate them into your IDEs to connect external tools to your agent, providing it with context and levers for action to reduce redundant tasks -> Your IDE becomes a true all-in-one tool.
Cloud Email Microservices: A Guide to Using AWS Lambda and Cloudflare Workers
Deploy an email microservice on Lambda and handle queues — invoke from Cloudflare Workers or any Node.js backend
 remix.run
.png)
Best Practices for an Optimized Contact Page Design
Build a Contact Page That Connects — and Blocks Spam
.png)
7 Ways to Stop Form Spam in Remix / Node.js
Flag bot activity, use built-in rate limit APIs, prevent bounced emails
Remix.png)
Send and Receive Custom Domain Emails for Free
Set up free professional email addresses like you@yourdomain.com without hosting a mail server or paying for Google Workspace. This guide shows how to receive emails using Forward Email and send as your custom domain via Gmail — fast, reliable, and 100% free.
.png)
CI/CD deep-dive: Deploy a scalable Multi-Environment React App to AWS S3 + CloudFront with GitHub Actions
Learn how to build and deploy a scalable multi-environment React + Vite app using Domain-Driven Design, GitHub Actions for CI/CD, and AWS S3 + CloudFront for fast, cost-effective static hosting. Includes environment-specific configs, branch-based workflows, and secure AWS deployment setup.
Comments
Be the first to comment!